



How to Roll a Joint: Beginner-Friendly Step-by-Step Guide

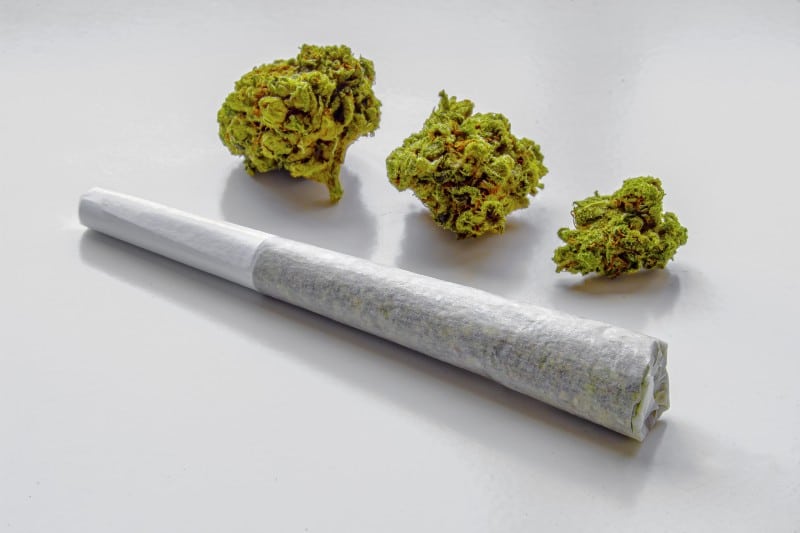
Quick Answer: To roll a joint, grind your THC flower to a medium consistency, place a crutch at one end of a rolling paper with the adhesive strip facing up, spread 0.3 to 0.5 grams of flower evenly across the paper, tuck the unglued edge around the flower, roll toward the gum line, seal it, and gently pack the open end. Most beginners start with a 79mm roller paired with 1¼ papers because this combination offers a straightforward learning experience while producing consistent results.
Rolling a joint for beginners can feel intimidating, especially when you watch someone else do it effortlessly while your own attempts fall apart. The goal is not making your joint look perfect. The goal is creating something that holds together, has good airflow, and burns evenly. Everything else is just style points.
We’ll cover supplies, the best beginner setup, a step-by-step rolling method, paper and filter choices, common mistakes, troubleshooting fixes, and answers to frequently asked questions. One important note before we dive in: only purchase and use cannabis or hemp products where they are legal in your area, follow age requirements, and never drive or operate machinery after using intoxicating products.
🔑 Key Takeaways
- A 1¼ rolling paper, paper crutch, and 0.3 to 0.5 grams of flower make the easiest beginner setup.
- A medium grind, not large chunks or powder, helps the joint burn more evenly.
- A crutch improves structure, supports airflow, and keeps loose flower from entering your mouth.
- The tuck is the hardest part for most beginners, so start at the crutch and work down the joint.
- A good joint should feel firm but slightly springy, not rock-hard or loose and hollow.
What Is a Joint?
A joint is ground cannabis or hemp flower rolled in a smoking paper. It’s one of the oldest and most traditional ways to enjoy flower, and it remains popular because it requires minimal equipment.
Joints differ from other smoking methods you might have heard about. A pre-roll is simply a joint that was rolled in advance, often by a manufacturer. A blunt uses a tobacco leaf or tobacco-based wrap instead of standard paper. A spliff mixes tobacco with cannabis flower. A cone is a pre-rolled paper shaped into a tapered cylinder that you fill and pack rather than roll by hand.
This guide focuses on hand-rolling a basic joint with a crutch or filter. Once you learn this technique, you’ll have the foundation to explore other rolling styles, like learning how to roll a Backwoods blunt or using pre-rolled cones.
Legal and Responsible Use Note
Cannabis and hemp rules vary by location and product type. Hemp-derived products containing less than 0.3% Delta 9 THC are federally legal under the 2018 Farm Bill, but state laws may differ. Some states have stricter regulations on cannabinoids like Delta 8 THC or THCA, while others have embraced these products more openly.
Always check local laws before purchasing or using any hemp or cannabis product. Only use if you are of legal age in your state. Never drive or operate machinery after using intoxicating cannabinoids like Delta 8, Delta 9, or heated THCA products. This guide does not provide legal or safety guarantees.
What You Need to Roll a Joint
Before you start rolling, gather your supplies on a clean, flat surface. Having everything within reach makes the process smoother and helps you avoid spills.
Flower is the most essential ingredient. Start with 0.3 to 0.5 grams for a beginner-friendly joint. Less flower is easier to manage while you’re learning the technique. You can use THCA flower, CBD flower, or any smokable hemp variety you prefer.
A grinder helps create a consistent texture. A quality grinder breaks down your flower evenly without crushing it into powder. If you don’t have a grinder, you can break flower apart by hand, but be sure to remove stems and avoid leaving large chunks.
Rolling papers are the wrapper that holds everything together. 1¼ size, often around 78×44mm, is one of the most popular sizes for cannabis rolling. It produces a joint that holds 0.3 to 0.5 grams of flower and is comfortable to share or finish solo.
A crutch or filter tip adds structure and supports airflow. Some rolling paper packs include filter material, or you can use stiff paper like a business card. Reusable glass tips are another option if you want something more durable.
A rolling tray or clean flat surface catches spills and makes setup easier. This is especially helpful when you’re learning because you can recover any flower that escapes during rolling.
A packing tool helps you finish the tip. A pen cap, chopstick, or the small paper packer included in some rolling paper packs all work well.
A lighter or hemp wick is used to light the finished joint evenly. Some people prefer hemp wick because of the way it lights and how it can affect flavor.
Before You Start: Joint Rolling Checklist
Preparation makes the actual rolling much easier. Walk through these steps before you touch your rolling paper.
Wash and dry your hands first. Oils and residue on your fingers can make the paper harder to grip and seal. Use a clean rolling tray or flat surface to keep your workspace organized. Remove stems and seeds from the flower before grinding, since these can poke holes in your paper or create spots that burn unevenly.
Grind flower to a medium consistency. You want pieces small enough to pack evenly but not so fine that they turn to powder and clog airflow. Choose the correct paper size for the amount of flower you have. Use a crutch or filter if you’re new to rolling, and start with less flower than you think you need.
Before filling the paper, check that the adhesive strip is facing up and toward you. This positioning makes sealing much easier. Finally, confirm that all products you’re using are legal where you live.
Best Beginner Setup for Rolling Your First Joint
The best rolling papers for beginners are often 1¼ hemp papers because they are easy to handle, stick reliably, burn evenly, and are forgiving of mistakes. The 1¼ size provides enough material to work with without being overwhelming.
Pair that paper with 0.3 to 0.5 grams of flower ground to a medium consistency. Add a paper crutch or filter, and aim for a slight cone shape or straight cylinder. The finished joint should feel firm but not overly tight.
Beginners should avoid oversized joints. King-size papers and fat rolls are harder to tuck, seal, and smoke evenly. They require more precise technique and better flower distribution. A smaller joint gives you more control and a better learning experience.
Focus on airflow and an even pack rather than appearance. A joint that looks a little rough but smokes smoothly beats a perfect-looking joint that canoes or clogs.
How Much Flower Should You Put in a Joint?
Overfilling is one of the most common beginner mistakes. When you pack too much flower into the paper, the joint becomes difficult to tuck, hard to seal, and prone to burning unevenly. Underfilling creates different problems, including loose rolls, fast burns, and harsh draws.
| Paper Size | Beginner-Friendly Amount | Best For | Notes |
|---|---|---|---|
| Single wide | 0.25 to 0.4g | Smaller personal joints | Single wide is the smallest standard size. The joint you produce is narrow and short, closer in diameter to a cigarette. |
| 1¼ paper | 0.3 to 0.5g | Beginners | 1¼ papers are generally about 76mm long and 44mm wide, providing noticeably more room than a single wide without becoming bulky. That extra width makes them friendlier for beginners. |
| King size | 0.7 to 1.0g | Intermediate users | Harder to tuck and burn evenly |
| Cone-style joint | 0.5 to 1.0g | Beginners using cones | Easier than hand rolling |
| Fat joint | 1.5g+ | Advanced users | More likely to canoe, clog, or burn unevenly |
If this is your first time, use less flower than you think you need. You can always roll a second joint, but you can’t fix an overstuffed one without starting over.
How to Roll a Joint Step by Step
This step-by-step guide walks you through the entire process. Take your time with each step, especially the tuck, which trips up most beginners.
Step 1: Grind the Flower
Use a grinder for an even texture. Place your flower buds inside, close the lid, and twist until the material breaks down. Open the grinder and check the consistency. You want a medium grind that looks fluffy but holds together when lightly pressed.
Avoid leaving large chunks, which create air pockets and uneven burning. Also avoid grinding too fine, which turns the flower into powder that restricts airflow. Remove any stems you find since these can tear the paper during rolling.
An even grind is what sets the tuck up for success. It’s the detail most beginners underestimate on the first roll, and the one that makes the biggest difference.
Step 2: Make the Crutch or Filter
A crutch serves several purposes. It gives the joint structure, supports airflow, creates a comfortable mouthpiece, and keeps loose flower from entering your mouth. Making one takes about 30 seconds.
Use the accordion fold method for the most reliable filter. Take a piece of stiff paper about 2 to 2.5 inches long and half an inch wide. Fold one end back and forth four or five times, creating small zigzag pleats. Then roll the remaining paper around the folded section to form a small cylinder.
The finished crutch should match the thickness you want for your joint. If you prefer a thicker joint, roll more paper around the accordion. For a slimmer joint, use less. Premade filter tips and reusable glass tips work as alternatives if you don’t want to fold your own.
Step 3: Position the Rolling Paper
Hold the paper between your thumb and index fingers with the adhesive strip facing up and toward you. The paper should form a shallow U-shape, like a tiny taco shell. Place the crutch at one end of the paper.
Right-handed rollers typically place the crutch on the left side. Left-handed rollers often find the opposite more comfortable. Experiment to see which positioning feels natural for you. The crutch should sit at the very edge of the paper so it becomes part of the finished mouthpiece.
Step 4: Add and Shape the Flower
Sprinkle the ground flower evenly across the paper from the crutch to the open end. Use slightly less near the crutch to protect airflow. If you want a cone shape, add slightly more flower toward the open end and gradually taper down toward the filter.
Once the flower is distributed, gently roll the paper back and forth between your fingers to shape the material into a cylinder. This pre-shaping step makes the tuck much easier. You’re not sealing anything yet, just encouraging the flower to take the right form.
Step 5: Tuck and Roll
This is usually the trickiest part of the entire process. Gently roll the paper between your thumbs and index fingers, continuing to shape the flower inside. When the material feels evenly distributed, you’re ready to tuck.
Start the tuck near the crutch. Roll the paper down until the unglued edge is just below the flower line, then tuck that edge around the flower and under the other side of the paper. Keep the tuck snug against the crutch.
Work the tuck down the length of the joint, rolling the paper upward as you go. The goal is to wrap the flower tightly enough that it holds together while leaving enough space for air to pass through. Don’t worry if your first few attempts look uneven. The technique improves quickly with practice.
Step 6: Seal the Joint
Lightly moisten only the adhesive strip with your tongue or a damp finger. Avoid soaking the paper since too much moisture makes it tear or stick in the wrong places. You want the gum line just wet enough to adhere.
Press the seam gently from the crutch end to the tip. Start at the mouthpiece and work toward the open end, smoothing the paper as you go. Make sure the seam is fully sealed with no gaps or bubbles. A smooth seam helps the joint burn evenly.
Step 7: Pack and Finish the Tip
Tap the crutch end lightly on your rolling tray or a flat surface to settle the flower toward the mouthpiece. This packing step ensures there are no large air gaps inside.
Use a small packing tool, like a pen cap or chopstick, to gently pack the open end. Do not overpack the tip. Stuffing too much flower into the final section restricts airflow and makes the joint hard to light.
Twist or fold the open end to finish the joint. A simple twist keeps the flower secure during storage and transport. You can tear off the twisted paper before lighting or burn through it as you start your session.
Running into issues? Tap what’s going wrong — get the cause and quick fix without reading the whole table.
Real-Time Joint Troubleshooter
Tap what’s going wrong right now. Get the most likely cause, what to do with the joint that’s already in your hand, and what to do differently next time.
Lab-tested hemp flower and pre-rolls with clear potency labels and published COAs.
This tool covers common rolling and smoking issues. Results vary based on product, technique, and flower consistency. Always review product lab results before purchasing hemp flower or pre-rolls. Keep all hemp and cannabis products out of reach of children and pets.
How Tight Should a Joint Be?
A good joint should feel firm enough to hold its shape but loose enough for air to pass through easily. Think firm but slightly springy. When you squeeze the joint gently, it should give a little without feeling hollow or collapsing.
Rock-hard rolls restrict airflow and make the joint difficult to pull. You’ll find yourself drawing hard with little smoke reaching you. The ember may also go out frequently because not enough oxygen flows through to keep it burning.
Loose, hollow rolls have the opposite problem. They burn too fast, waste flower, and often canoe because the uneven packing causes one side to burn faster than the other. The draw might also feel harsh and hot.
Joint Density by Section
Different parts of the joint need slightly different densities for the best smoking experience.
Crutch end: This section should be snug enough to hold the filter in place. The paper should wrap tightly around the crutch so it doesn’t slip out during use.
Middle: This is where most of your flower sits. Pack it evenly with no large gaps. The density should feel consistent from one side to the other.
Tip: Pack this section lightly. A slightly looser tip allows airflow to start the burn and helps keep the tip from getting plugged. Overpacking the tip is one of the most common reasons joints are hard to light.
Tips for an Even Burn
An even burn comes down to preparation and technique. Get these basics right and the joint burns cleanly from start to finish.
Use a medium grind consistency. Flower that’s too chunky or too powdery creates uneven airflow. Remove stems before rolling since they burn at different rates than the surrounding flower. Distribute flower evenly across the paper, paying attention to how the material sits before you start the tuck.
Avoid overpacking near the crutch. This area needs slightly less density to support airflow. Keep your tuck even from one end to the other instead of tight in some spots and loose in others. Seal the gum line smoothly with no gaps or bubbles in the seam.
When lighting, rotate the joint slowly while applying flame to the tip. This toasting technique helps the burn start evenly across the entire surface. Once lit, take slower, steadier pulls rather than harsh, quick draws. Fast pulling can cause the ember to burn unevenly.
Proper flower storage also matters. Flower that’s overly dry burns hot and fast. Flower that’s too moist can be hard to keep lit and may burn unevenly. Store your cannabis flower in an airtight container away from direct light and heat.
Common Joint Rolling Problems and How to Fix Them
Every roller hits these problems at some point. Here’s what’s causing them and how to fix it.
| Problem | What It Looks Like | Most Likely Cause | How to Fix It Next Time | Quick Save |
|---|---|---|---|---|
| Joint canoes or runs | One side burns faster than the other | Uneven pack, lopsided roll, or uneven lighting | Spread flower evenly and rotate while lighting | Lightly dampen the fast-burning side |
| Hard to pull | Little airflow, struggle to draw smoke | Rolled too tight, grind too fine, or blocked crutch | Roll slightly looser and avoid powdery flower | Massage gently or use a thin poker carefully |
| Burns too fast | Harsh, quick burn that wastes flower | Roll is too loose or flower is too dry | Pack slightly firmer and use a more even grind | Tamp the end lightly and take slower pulls |
| Keeps going out | Needs frequent relighting | Too tight, too moist, or poor airflow | Improve airflow and avoid overpacking | Loosen gently between fingers |
| Flower gets in mouth | Loose bits pull through when drawing | No filter or poorly made filter | Use a crutch with accordion folds | Use a better crutch next time |
| Crutch falls out | Filter slips loose during use | Not enough pressure near mouthpiece | Start the tuck around the crutch more snugly | Push crutch back in and pinch paper around it |
| Paper tears | Rip near seam or along the roll | Overfilled joint or wet paper | Use less flower and moisten only the gum strip | Patch with another paper |
How to Save a Badly Rolled Joint
Not every joint comes out right, but many problems have quick fixes that let you salvage your work instead of starting over.
Too loose: Gently pack from the open end using a small tool. If the flower is too scattered inside, you may need to unroll and redistribute before rerolling.
Too tight: Massage the joint gently between your fingers to loosen the pack slightly. This can improve airflow enough to make the joint usable.
Torn paper: Patch the tear using the adhesive strip from another rolling paper. Cut or tear a small piece and apply it like a bandage over the damaged area.
Uneven burn: Rotate the joint while lighting to even out the starting ember. During smoking, slow down your pulls and gently dampen the side burning faster.
Bad airflow: Check whether the crutch is blocked or if the pack is too dense near the mouthpiece. Sometimes a thin poker can clear a small blockage without destroying the joint.
Crutch slipping: Push the crutch back into place and pinch the paper around it firmly. If it keeps slipping, the initial tuck around the filter wasn’t tight enough.
Seam opening: If the seam separates, reseal it with a small patch of adhesive paper or lick the area and press it closed again.
What Rolling Papers Are Best for Beginners?
Choosing the right rolling papers as a beginner can make the difference between frustration and success. The “best” paper depends on what you prioritize: ease of handling, thinness, flavor neutrality, or burn speed.
| Paper Type | Best For | Tradeoff |
|---|---|---|
| Hemp papers | Balanced burn and natural feel | Hemp 1¼ size papers are typically easy to handle, stick reliably, burn evenly, and are forgiving of mistakes. The 1¼ size provides enough material to work with without being overwhelming. |
| Rice papers | Thin paper and clean taste | Rice papers can be trickier to roll by hand, especially for beginners, because that thinness makes them less forgiving of uneven packing. |
| Wood pulp papers | Easier handling | Wood pulp rolling papers are classic sheets that are easy to roll but burn quickly. They are thicker than rice or hemp, which makes them very sturdy for beginners learning the movements. |
| Flavored papers | Added flavor variety | Can overpower the flower’s natural taste and may burn less evenly |
| Pre-rolled cones | Easiest option | Paper cones are often the easiest option for speed because no rolling technique is required. Less practice with traditional technique. |
Start with hemp or wood papers, then try rice papers after 20 to 30 successful rolls. Forgiving papers help you build confidence before moving to thinner materials that require more precision.
Should You Use a Filter or Crutch?
Yes. Beginners should use a crutch every time they roll.
A crutch helps the joint hold its shape during rolling and smoking. It supports airflow by creating a clear channel for smoke. It keeps loose flower from entering your mouth, which improves the overall smoking experience. The mouthpiece is easier to handle and stays open instead of collapsing when you draw.
Using a crutch also keeps the end of the joint sturdier and less likely to close up. Without a filter, the paper often sticks together as you smoke, making the final draws difficult.
Some experienced rollers skip the crutch for style or personal preference reasons. For beginners, though, a crutch removes one of the biggest sources of frustration and makes the rolling process significantly easier.
Can You Roll a Joint Without a Filter?
Yes, you can roll a joint without a filter, but it’s usually harder for beginners. The absence of a crutch creates several potential issues that complicate both the roll and the smoking experience.
The mouthpiece can collapse during rolling or while smoking because there’s nothing inside to hold the shape. Flower may pull through into your mouth when you draw, especially near the end of the joint. Airflow can be less consistent since there’s no structured channel.
If you need to roll without a filter, leave a little empty paper at the mouthpiece end. Pinch or twist this section slightly to create a makeshift barrier. Avoid packing too tightly near the mouthpiece so some airflow can pass through.
Hand Rolling vs. Cones vs. Rolling Machines
The right choice depends on whether you want to learn the traditional skill, prioritize convenience, or just want consistent results without mastering technique.
| Method | Best For | Pros | Cons |
|---|---|---|---|
| Hand rolling | Learning the classic skill | Most control over shape, size, and density | Takes practice to master |
| Pre-rolled cones | Beginners who want ease | Easiest and most consistent results | Less customizable and doesn’t build rolling skill |
| Rolling machine | Users who struggle by hand | Fast, uniform joints every time | Less control over cone shape and density |
Use cones if you want the easiest experience with minimal learning curve. Use a 1¼ paper and crutch if your goal is learning to roll the perfect joint by hand. Rolling machines offer a middle ground for people who want consistency without mastering technique.
Beginner, Intermediate, and Advanced Rolling Methods
Beginner Method
Start with a 1¼ paper and 0.3 to 0.5 grams of flower ground to medium consistency. Always use a crutch. Focus on airflow and even packing rather than how the joint looks. A simple straight cylinder or slight cone shape works best while you’re learning.
Intermediate Method
Once you can consistently roll joints that smoke well, start experimenting. Practice shaping the flower before sealing to achieve more precise cylinder or cone forms. Learn to control density across the whole joint so the mouthpiece, middle, and tip all burn at the same rate.
Advanced Method
Advanced rolling includes techniques like backrolling, which uses less paper for a cleaner taste. Larger rolls, artistic shapes, and specialty wraps fall into this category too. These methods require solid fundamentals, so focus on mastering the basics before moving on.
Prefer Pre-Rolls?
If hand-rolling isn’t appealing or you want something ready to enjoy right away, pre-rolls skip the learning curve entirely. These are joints rolled in advance and ready to light.
Pre-rolls come in many varieties. The Hemp Doctor offers options like 1.25G THCA Pre-Rolls for a straightforward smoking experience and THCA Sugar Diamond Infused Pre-Rolls for a more elevated flower option. There are also bubble hash infused options for those who want something more concentrated.
Pre-rolls are useful when you’re short on time, traveling, or just don’t feel like rolling. They also make good gifts or introductions for adults curious about smokable hemp.
Shop Lab-Tested Flower, Pre-Rolls, and Accessories
The Hemp Doctor carries lab-tested THCA flower, ready-to-smoke pre-rolls, and accessories like grinders and rolling paper cones. All products include third-party lab results available on the Lab Results page.
For more information about different cannabinoids, explore our guides on What Is THCA, What Is Delta 8 THC, and What Is Delta 9 THC. Our strain guide can help you compare flower options based on flavor, aroma, and product style.
Conclusion
Rolling a joint is a skill that improves with practice. Your first few attempts might look rough, and that’s completely normal. Focus on the beginner formula: 1¼ paper, paper crutch, medium grind, 0.3 to 0.5 grams of flower, an even tuck, and a gentle pack.
Don’t worry about perfection. A joint that holds together and smokes smoothly is a success, regardless of how it looks. Pay attention to airflow and flower distribution more than aesthetics. Those fundamentals matter far more than appearance.
Remember to follow local laws and use products responsibly. Hemp products containing less than 0.3% Delta 9 THC are federally legal, but state regulations vary. Never drive or operate machinery after using intoxicating cannabinoids.
If you’d rather skip the learning curve or stock up for your next roll, explore The Hemp Doctor’s pre-rolls for a ready-made option.
-
Sale!On Sale
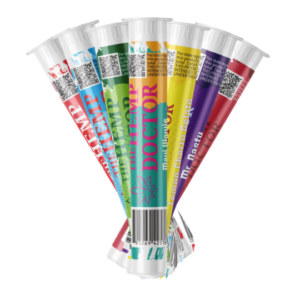
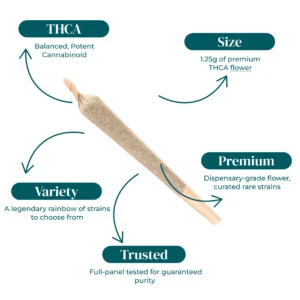
THCA PRE-ROLLS | 1.25G
Original price was: $12.95.$6.95Current price is: $6.95.Shop Now This product has multiple variants. The options may be chosen on the product page -
Sale!On Sale

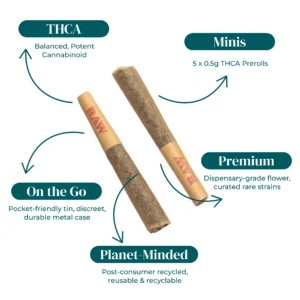
THCA BUBBLE HASH INFUSED PREROLLS | 5-PACK TINS
Original price was: $34.95.$20.95Current price is: $20.95.Shop Now This product has multiple variants. The options may be chosen on the product page

